An overpass at Parkman allows access to both sides of the railroad. If you search for photos taken at Parkman, you will find that this overpass is frequently used by railfans to capture images of trains passing by.
It seemed that my layout needed a miniature version of this overpass. After a perfunctory search of the internet I was not successful in finding any good pictures of the bridge. As a result I decided to try modeling one of the wooden bridges at Hawley, MN since I did have a photo of this taken a few years ago that would give me something to work from.
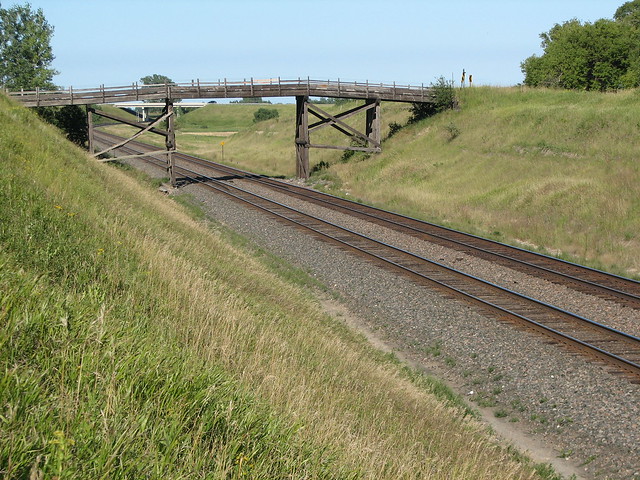 |
| Wrong state, wrong bridge! |
After posting a picture of what I was up to on Facebook, I noticed a comment from Chris Atkins, who is also modeling this section of railroad (plus a lot more!) asking if I intended to model the bridge at Parkman. When I answered yes, he offered up numerous photos of the bridge which revealed a lot of detail, including these found on bridgehunter. Turns out my attempt to use the bridge at Hawley as a prototype was way off base.
 |
| You're doing it wrong |
The bridge at Parkman is not only completely different, it is more interesting as it contains a pony truss and railroad rails as part of the support elements. Perhaps the most striking difference, to my eye, is clear in this photo. Rather than three straight sections with angled transitions between them, this bridge looks to have a more gradual curving line up and over the tracks. Which presented a problem from the modeling perspective, as in how do I create this gradual curve when all I have to work with is straight pieces of miniature lumber?
So I sat down to think. And ponder. And after extensive contemplation, I came up with the idea of soaking the tiny timbers in hot water followed by a drying session in a jig that held them in the bent position. Here are the main timbers in the jig as they dry.
 |
| Got carried away with the paintbrushes |
And here are the results after drying overnight. The curve held well when removed from the jig!

In fact, it looks like my first attempt may have been bent too much. I certainly didn't expect that, but with this square timber priced at 79 cents at Hobby Lobby, I guess I can make an adjustment to the jig and try again.

After reviewing the scene, it's clear that I need to make the fill on each side of the bridge have more gradual slopes. So it will be back to the drawing board when I get time to work on the layout again.
Finally, one more shout out to Chris Atkins. Without his help I would still be trying to jam west-central Minnesota into Wyoming. Thanks again, Chris, the photos and assistance are greatly appreciated!
