Showing posts with label modeling. Show all posts

Wednesday, April 11, 2018

The Trials and Tribulations of Crossing the Tracks in Parkman, Wyoming

My Big Horn Sub layout models some of the BNSF mileage between Sheridan and Parkman, Wyoming. One of the modeled locations is the siding at Parkman, which is the summit of Parkman Hill and the point where helpers will cut off to return to Sheridan and await the next westbound train needing help.

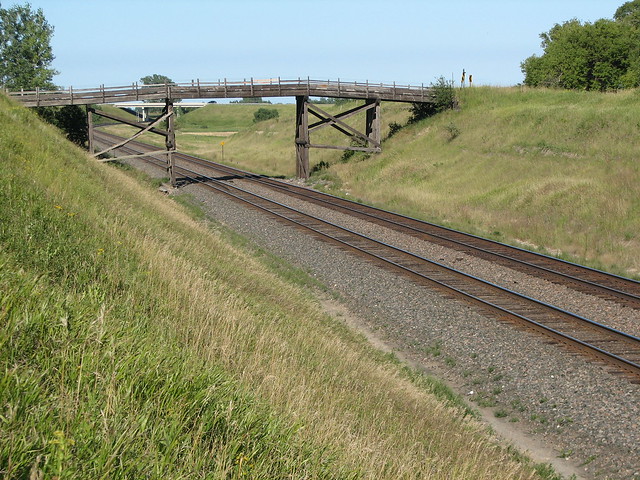
An overpass at Parkman allows access to both sides of the railroad. If you search for photos taken at Parkman, you will find that this overpass is frequently used by railfans to capture images of trains passing by.

It seemed that my layout needed a miniature version of this overpass. After a perfunctory search of the internet I was not successful in finding any good pictures of the bridge. As a result I decided to try modeling one of the wooden bridges at Hawley, MN since I did have a photo of this taken a few years ago that would give me something to work from.

East Wooden Bridge at Hawley
Wrong state, wrong bridge!

After posting a picture of what I was up to on Facebook, I noticed a comment from Chris Atkins, who is also modeling this section of railroad (plus a lot more!) asking if I intended to model the bridge at Parkman. When I answered yes, he offered up numerous photos of the bridge which revealed a lot of detail, including these found on bridgehunter. Turns out my attempt to use the bridge at Hawley as a prototype was way off base.

You're doing it wrong

The bridge at Parkman is not only completely different, it is more interesting as it contains a pony truss and railroad rails as part of the support elements. Perhaps the most striking difference, to my eye, is clear in this photo. Rather than three straight sections with angled transitions between them, this bridge looks to have a more gradual curving line up and over the tracks. Which presented a problem from the modeling perspective, as in how do I create this gradual curve when all I have to work with is straight pieces of miniature lumber?

So I sat down to think. And ponder. And after extensive contemplation, I came up with the idea of soaking the tiny timbers in hot water followed by a drying session in a jig that held them in the bent position. Here are the main timbers in the jig as they dry.

Got carried away with the paintbrushes

And here are the results after drying overnight. The curve held well when removed from the jig!


In fact, it looks like my first attempt may have been bent too much. I certainly didn't expect that, but with this square timber priced at 79 cents at Hobby Lobby, I guess I can make an adjustment to the jig and try again.


After reviewing the scene, it's clear that I need to make the fill on each side of the bridge have more gradual slopes. So it will be back to the drawing board when I get time to work on the layout again.

Finally, one more shout out to Chris Atkins. Without his help I would still be trying to jam west-central Minnesota into Wyoming. Thanks again, Chris, the photos and assistance are greatly appreciated!

Monday, May 23, 2016

Incremental Improvement

Sometimes progress comes in great leaps, and other times (likely usually) it comes in tiny, nearly undetectable nudges in the right direction. Last night the progress fairy visited me and dropped a helping of the latter. 

As part of my layout reconstruction, I have spent the last few weeks working on a staging yard. Now since this will be just below the operating level of the layout, it needs to be complete before I can take another step. That means not just track laid, but also switch controllers and feeders installed, track joints soldered, and enough trains run through to prove the trackwork is good, as it won't be easy to access once the top deck is in place. 

The track is all down, and the switch ladders are built, so I have set to putting in the classic electrical box controllers. Below is a view of one that I pulled off the old layout. Now understand, these are the best solution to controlling turnouts I have stumbled upon. I drill a hole through a dowel, push the free end of the wire through the hole, and bend the wire to hold it in place. But there is still room for improvement. I got to thinking. Never a good thing. 


Below is a view of the bronze wire I have used to engage the throwbar on the turnout and the handle of the switch in the past. One of the issues this poses is there is nothing to resist lateral force that can make the wire move sideways, and in extreme cases even disengage from the throwbar as it drops down. This is generally known as a bad thing. Takes lots of fiddling to get it back in place.


So I sat and I thought...how can I make this work better. And I had a light bulb moment. The result of this revelation is below. Two extra bends create a situation where the wire is restrained from moving in one direction laterally, and after the dowels that operate the switches are installed, it won't be able to move in either direction. Eureka, I said!


So here is what the new assembly looks like after everything is put together, ready to install under the layout. Not much of a change, but it makes a significant difference in the stability of the whole thing. Notice that I tightened up the spacing between the vertical portion of the wire and the side of the switch as well. This was partly due to a dandy little pair of pliers I scored for four bits at a rummage sale, with jaws just the right width to make this bend.


Mr. L4T is a happy camper!

Now for those who have read this far, a bonus pro tip. I used to struggle mightily getting the screws into holes in the junction box while holding everything in place. The I said, forget the holes and just drive a screw THROUGH the jbox and into the plywood. Turns out this is much easier, on the patience supply and the spine. Eureka, I said again!

Ain't progress grand?

Saturday, January 24, 2015

Operations!

There are a great many enjoyable aspects to model railroading. As you know if you are a long time reader of look4trains, creating new things from scraps has always been one of my favorites. Another thing I've always enjoyed is imagining how the minature world I'm constructing would fit into the larger transportation system. 

There comes a time, though, when making new things and watching trains run make you hungry for more. In my case, I've long wanted to see if what I imagine would work. The only way to test this case is to put the railroad through its paces, which requires people. I've had a taste of operations, as it's known, on Phil Keppers large NP layout here in Duluth. And I liked it. Quite a lot. So much, in fact, that I wanted to do it on my layout as well. So it came to pass that I invited a group of modelers over this Saturday afternoon. Here's half the group that attended, mostly engaged in observing professional railroader Kent Rengo as his train heads back to the yard after working the cement plant, paper mill, and lumber siding. 
Here's a shot of the power on Kent's train as it approacheds the helix that will take it down to the staging level.
Across the room, it appears a job briefing is underway as Scott Carney and Dan Mackey confer over the safe way to the get the work done. Now Dan isn't sitting down on the job, rather, his Soo Line transfer job is dropping cars at the lower level staging yard and the office chair gives a better view of the work.
Finally, in a scene that might be common to all model railroad operating sessions, at one time or another there is a traffic jam. This time it's Kent in the hot seat, as he switches out the cars his train just brought down the helix. Scott is working the paper mill switch job, while Dan's Soo power is running light back to the Soo yard in the other room. Henry Carney is just visible behind his dad, and waits for Dan to pass so he can use the main to run around his grain train before shoving it into the Rengo Storage tracks. It's a busy spot, working as designed. Luckily I left some room for people when I designed the layout. Probably one of the only things I did right.
In all, we ran 5 trains, including the Paper Mill turn, Soo Line Elevator Job, Soo Transfer, Grain Unit Train to Rengo Storage, and the Paper Mill switch job. It was enough to keep us entertained, if not continuously busy, for a couple of hours. Just right.

The morning was a madhouse as I ran around trying to make last minute changes to switchlists, yard trackage, worked at cleaning track, arranging cars, etc. One of my takeaways is that good preparation will be rewarded with smoother operation. A second learning is that operating sessions will test your track work and rolling stock. Murphy's Law is in full force, and if you think something may cause a derailment, you pretty much bet it will. More than likely, you will come away from the session with a punchlist of required repairs as long as your arm. But that's OK. Continuous improvement is how we get better.

So even with some hiccups, it was great fun. As someone said in the post-session discussion, the cars got where they belong, and no one got hurt. That's a success. Thanks to all who participated. Hope to get some of the glitches fixed and try it again soon. 

Sunday, October 12, 2014

Fading Away

While the title could be applied to my blogging career, in this case it's not. Instead I thought I would take the opportunity to explain some of what I've been doing in the basement lately. Here's a visual example:


The itch to make some of my cars look a little more realistic-which in the case of anything with BN reporting marks would mean older-is what I've been trying to scratch. In the past the effort has involved spray cans, airbrushes, and sandpaper. None have been completely satisfactory, and especially in the case of airbrushes, the need for a place to paint and the clean up time are stumbling blocks to getting anything done. Recently the efforts have been influenced by advice like this.

So I've gathered up a small supply of tools and material, for example, this stuff:


And then I go to work as shown in the link to Jeremy's Dry Brush Technique, above. 

Once I have completed the fade and sealed it with dullcoat, I bust out the Pan Pastel powders and a small brush to start dirtying up the car. If you try this, go easy, the powders are powerful strong, much more so than any weathering powders I have used. While my skills are far from perfected, I am somewhat pleased that the cars aren't ruined. At least I'm still willing to leave them in sight on my layout. 

One of the challenges of weathering, for me at least, is knowing when to stop. Most of my earlier efforts tend toward the grubby, grimy side of reality, which while it does exist, certainly is not illustrated on the majority of rolling stock seen on the rails. On the other hand, I want to be able to tell I've weathered the car. Combined with a lack of patience, this probably leads me to over-weather a lot of things. 

Another challenge is trucks. The slippery plastic that is used to mold HO scale trucks is tough to get paint to stick to. I have had some luck with oil paint, but one needs to be careful not to overdo this as well since the paint can easily fill all the finely molded detail on the trucks. 

Finally, wheels are models too. I have been just slapping a layer of burnt umber oil on them, for the most part, although in a few cases this is followed up with some weathering powder. Another work in progress. 

Here's one final example of what I've been fooling with.


If you are interested in weathering, one final piece of advice. Set aside some time to listen to the Model Railroad Hobbyist podcast featuring Gary Christensen. His description of the frustrations of learning how to weather, and the revelation that is Dullcoat, are valuable information for the aspiring weathering artist. Gary has shared an article that clearly demonstrates that we don't need expensive equipment or material to acheive realistic results. The guy is truly an artist. 


Saturday, December 14, 2013

Craftsmanship

I got up early this morning, and after drinking a pot of coffee with Mrs. L4T headed east for Superior through the gloom and flurries of a Twin Ports December morning. My destination was the Mackey basement, where the mission I had accepted involved helping Dan with some of the staging benchwork on his massive HO layout. Coffee was consumed, plywood was butchered, jokes were told, and in the end even a little work was completed.

Dan takes a different approach to layout building than I have in the past. As you can see in the photo below, he is committed to ensuring things are plumb, level, and square, not to mention well built and intended to stay that way. 


I think I have accumulated a lot of BNSF coal gondolas. Actually I probably do have one of the larger fleets that I am aware of of those particular cars. Amazingly, I think Dan has more woodworking clamps than I do coal gons. There are clamps everywhere you look. He clamps things up and down, side to side, back and forth, and I think if you cut yourself working on the layout he could likely clamp that shut too. The only thing he has failed at clamping that I know about is my mouth shut. If it's not expressing one crazy idea or another, it's likely eating fresh baked corn bread. Thanks Dan!

I just had to take a picture of the joint shown below. I used to do woodworking as a hobby and would have been pleased with such a joint in a piece of "fine" furniture. But this is in model railroad benchwork, and in a place where very few if any people besides Dan and I will ever see. Once the staging is completed you will likely have to crawl under the layout with a creeper and flashlight to see it. 


It was the impressiveness of this joint, I think, that caused me to blurt out something on the order of "Dan! That's amazing! I have used CARDBOARD for benchwork construction in the past!" Dan might have thought I was crazy, or making this up, or gone 'round the bend, but I soon had him convinced that this was absolutely the truth. On my old layout, I repurposed the cardboard corner protectors used for shipping heavy objects for legs. They worked really well, too. Didn't look near as nice as what you see above, but still...

The craftsmanship and scale of what Dan is building never ceases to amaze me. It's a lot of fun to have even a tiny role in building this empire and participating in operating sessions will be even more fun. Thanks for including me in what you are doing, Dan!

Friday, March 15, 2013

The Magic of Engine Driver

Last post, I talked at great length about how exciting it was to discover the Operations module in JMRI, the Java-based model railroad software suite. Operations was the answer to my wishes for some sort of system to create logical car movement on the railroad. After what seemed like an endless search, I (unlike U2) had found what I had been looking for.

With a couple of vacation days to use up this week, the goal became to dive a little deeper into the Java Model Railroad Interface, or JMRI. Little did I know I would end up discovering one of the most amazing applications of technology I have ever seen. And I've seen a fair amount of tech-starting with DOS running on 286 boxes, working through who knows how many versions of Windows, a touch of Linux, and a dozen or so cell phones and tablets. There have been some stunning uses of 1's and 0's on that list, including things like railroadradio.net, ATCS, various photo and video editing software, and progressively more advanced digital cameras. Still, nothing matches the WOW!!! factor I felt today.

After wrestling with a Digitrax PR3 yesterday afternoon and evening, I finally managed to get it to perform its most basic function this morning, when I was able to read CV's and program DCC decoders. That was pretty stunning in itself. I never, ever would have considered using a speed table in a locomotive until I saw how simple Decoder Pro makes it. (Yes, Decoder Pro is just one part of the JMRI package, kind of like the Operations module is one small part.) Decoder Pro changed my whole approach to programming locomotives in about 3 minutes. Never again will I not change a CV because it is too much work, or takes too long, or I have to look up the numbers in a thick manual or on the web. No need for any of that now, just fire up Decoder Pro, open that roster number, make sure the loco is on the track, and program away in a point and click interface. Speed tables? No problem! Slice and dice them however you want. Momentum? Headlight effects? Kick start? It's all there.

And then I connected the PR3 to the layout, and the fun really began. I opened a "virtual" throttle on the screen of the laptop. I was able to control the locomotive while sitting at the computer! I could control speed, direction lights, sounds, the whole enchilada. And the throttle cost me nothing. Again, amazing is the word that jumps to the front of the list.

But the best was yet to come. I had downloaded something called "Engine Driver" onto my Android tablet, and it installed without a hitch. Somehow this was supposed to control locomotives wirelessly. I had no idea how but that has never stopped me before and so I clicked on a tab in JMRI that let me start a "WiThrottle Server". I clicked and poked and fiddled around until, wonder of wonders, I was controlling a train with my tablet. I could make it go forward, at any speed (at least any speed I allowed when I set up the speed tables). Or backward, or turn the lights off and on. Or make the horn blow or the bell ring. I was doing this with no wires connecting the tablet to anything. Here is what really amazes me-I was using software on a tablet computer, that was communicating with my wireless router, which was sending commands to my laptop, which was in turn talking to the Digitrax PR3 connected to it by a USB cable, which then was relaying information to the command station, a Digitrax DCS 51. THEN the command station was sending packets out the Loconet to the engine, which has a tiny computer chip inside that was deciphering those commands, and turning them into actions such as speeding up, slowing down, turning various things off and on, and changing direction. All at the speed of light.

Did I mention being amazed? Well I was.

The software is all free. I have the laptop, tablet, and command station. I paid around $65 for the PR3, which I really bought to use for programming, so this is just an added bonus.

Seriously, I was amazed. And then tonight I was playing with the setup some more and learned that while Engine Driver will run one engine, it is just as capable of running TWO. Just like my DT 402 throttle, yes, this software can control two engines at the same time.

I just love to discover new things like this. They are so much fun, and so exciting. And when you find something really useful, it's not just a temporary excitement, it lasts and lasts. I've got a feeling this is just the beginning of a long love affair with JMRI and the people who build it.

Wednesday, March 13, 2013

Let's Go Railroading!

I'm going to guess that nearly all model railroaders, when they are starting out, are fascinated by the sight of trains going round and round. That was and continues to be true for me. There's a problem, though-no matter how much space we have, it's not enough. In a matter of a very few minutes (for most of us) or maybe half an hour (for the very lucky few with access to a huge layout) we will be right back where we started. And it seems that with each successive revolution, a little of the magic slips away.

Faced as I was with the prospect of less space for a railroad than I previously had, thoughts turned to ways to make that space do more-visions of peninsulas and multi-deck layouts danced in my head. I went so far as building a helix, as much to prove to myself I could do at as because I had a fully developed idea of how it would be used. That desire to solve the helix problem illustrates my relationship with model railroading in a microcosm. I absolutely LOVE the problem-solving aspect of the hobby. Faced with how I was going to move trains from one level to the next, I couldn't stop myself from diving right in to helix construction, because the opportunity to "figger out how to do it" was so attractive.

I remember feeling the same way the first time I installed a hard-wired DCC decoder, or an LED headlight, or during my initial track ballasting attempts. I've spent many, many joy-filled hours figuring out what works for me when it comes to painting backdrops. I've loved puzzling out how to build a functional drop bridge for entering the layout room or testing various designs for manual turnout controls. Just the feel of a garage sale sign and the smell of MEK brings a smile to my face. The problems and their solutions-MY solutions-are the attraction for me.

So I needed to come up with a way to create more problems for myself. I've always thought that the next step for me was to figure out how to make my layout operated like a railroad in minuature, rather than a toy train. My opinion is that even the finest looking and operating equipment is missing something if it doesn't have some imaginary work to do. The roadblock has always been finding a way to generate the work randomly, yet retain some semblance of reality and logic as the work is performed.

I am happy to announce that I may just have finally figured that out.

I don't believe I will ever again HAVE to watch trains run around in circles. My tiny trains now have a purpose-they move imaginary freight over an HO Scale transportation system according to directions received from a virtual traffic department in a way that makes as much sense as anything I can imagine.

The Twin Ports Terminal Railway has implemented a new, computerized, state-of-the-art freight car forwarding system known in the industry as JMRI Operations. This digital workhorse helped me with the process of defining the locations served by my railroad, entering information on the rolling stock into a database, configuring routes that serve the various locations defined earlier, and finally, creating trains that follow these routes as required to provide the service needed in my 1/87th scale world. When I want work to do on my railroad, all that is required is to open up the "Trains" screen in JMRI Operations, pick which train will be run, click on the "Build" button, and print out a manifest I will use to move the proper cars to the locations they are needed by my industries.

With the train manifest in hand, it's up to me to pick up the power, figure out the best way to assemble my train to perform the required tasks, and move the cars across the railroad. Every car that will be moved is identified, with it's current location and intended destination shown. The proper types of cars are directed only to tracks where they should show up-grain cars to the elevator tracks, for example, and boxcars to the Can track, where canned dog food is loaded. Since the cans are heavier than the bags we also make at my dog food plant, Hi-cube cars are only loaded on the bag track. The program handles that, helping me to maintain that thin veil of realism that I have long been searching for when playing in the train room.

Sometimes, the work is complex and time consuming. Other times, it is easier and faster. Funny thing, it seems to me real life is like that too. The variety is a good thing, in my mind. If I was moving 2 boxcars and 3 grain hoppers every job, that would get boring, but it's almost part of the fun waiting to see what your work for the day is like.

And one more thing. My current layout is shown below. (Click on the image for a better view)

 
It's tiny, compared to my last layout, and even compared to what I have the space for now. But it's the most fun I have ever had operating. Last night I had to pick up two cars from the plant and exchange them for three cars on Tuffys Siding. By the time I got the three cars spotted in the plant, I had killed well over half an hour. That's to move a grand total of 5 railroad cars a cumulative distance of probably 30 feet. Of course, I had to shift around a few cars that were in the way in the process and place them back where they were needed. I also had to run around some of the cars to get on the proper end of them. It was a lot of work, and a lot of fun. After that was done, I got to run a Transfer job between the Duluth yard and Tuffys Siding, to pick up the cars from Tuffys and drop off a few for the next Plant Switcher.
 
I'm still inspired to build, but for a different reason that before. I want to share the fun with other model railroaders. Now I have a long term goal-get proficient enough at this that I can hold operating sessions that will allow others to participate as well.
 
I intend to make a series of posts over the next few weeks that share some of what I have learned about JMRI Operations. If anyone who has experience stumbles across this, please feel free to chime in in the comment section.
Tuesday, February 26, 2013

Workin' on the (Model) Railroad

I took the last couple of days vacation since I have time to burn before the end of March-use it or lose it. Turned out to be just about as busy as working, what with Doctor appointments, trips to the courthouse and City Hall, discussions with a Realtor, and a stop at the CPA, but I still managed to fit in a bit of modeling.

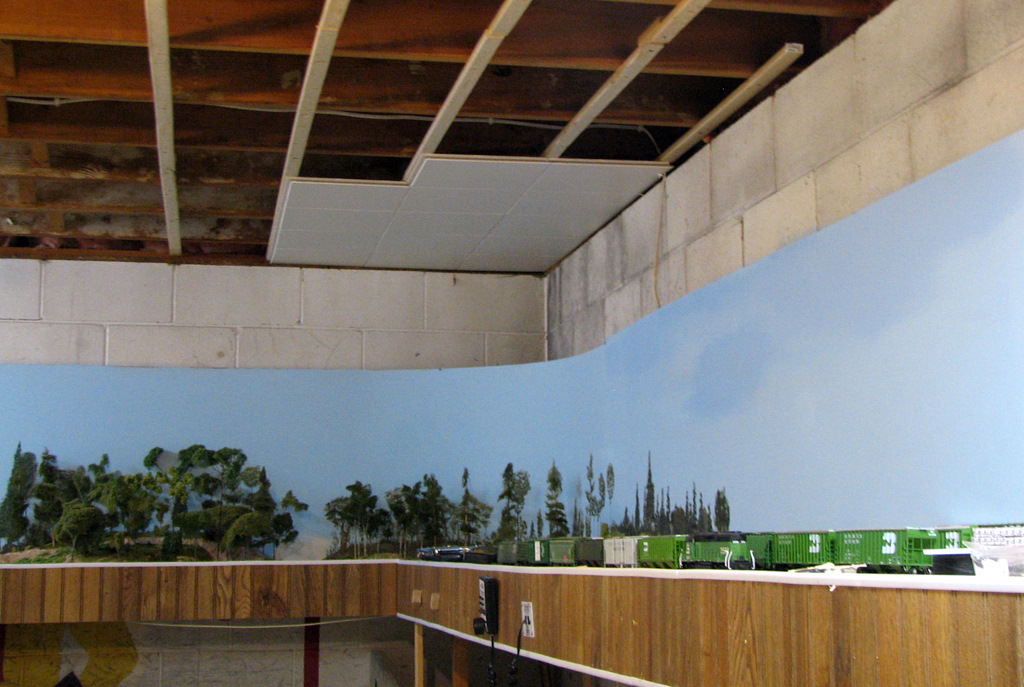
I'm trying to split my time between working on the rest of the train room installing ceiling tile and lights, and working on phase one of the layout. The layout won the last couple of days. I've been drilling holes for turnout controls, gluing down track, painting track, cleaning track, soldering feeders, and sometimes playing with trains. Thought I would share a couple of shots of what a layout under construction looks like at my house. First, the east end:

East End of Paper Mill/Dog Food Factory

And here is the west end:

West End of Paper Mill/Dog Food Factory

I titled these "Paper Mill/Dog Food Factory". Not with the intent of feeding the dogs paper, but rather, I am having a time deciding what industry this should be. I figure that a dog food factory needs grain, and would give me the excuse to deliver a few covered hoppers in some exotic paint schemes. Heaven knows I have them. Then again, the kaolin cars would look good at a paper mill.

Decisions, decisions. At least I have made one-the 19 degree crossing I was planning on using earlier is gone, replaced by moving a turnout into a different location. It seems to work OK for operating the layout. Time will tell if it was a good change or not.

Sunday, February 3, 2013

Rising like a Phoenix

It seems like a lifetime ago that I did this.


Over the last few weeks I have been working to undo that, a little bit at a time. Yesterday I shared a shot showing a bit of benchwork and some backdrop. Today I painted the backdrop. It's blue now, hardly worth posting a picture yet.

Readers might be interested in what is planned for the area, though. The basic idea is one side of a paper mill, with tracks for loading boxcars and unloading tank cars of chemical and kaolin clay. The paper mill will be modeled using building flats, just a few inches deep. First attempt at a trackplan looked like this:


It seemed like too little room for the spurs. I just wasn't happy with the arrangement. Since one spur was facing point and one trailing point, a runaround was needed. Then I was paging through Lance Mindheim's book on designing small industrial switching layouts and stumbled upon his idea of using a crossing to gain some space. That changed things up some, to this:


Now that's more like it. Keeps the runaround, but gives the spur more breathing room. I even added in one more track, for "off spot" boxcars. The loading area is on the left and tank car unloading will be on the right. Now to find an Atlas Code 83 19 degree crossing...
 
Next time I will try and share some more of the track plan, and outline the operating theory of the layout. Here's a hint: my track plan and operating concept have been heavily influenced by exposure to the Twin Ports. 


Saturday, February 2, 2013

Progress in the Basement

Long time, no post. Thought I would share a little of what I have been working on lately. The layout room isn't done, far from it, but I do have the studs up all the way around, the ceiling installed in about a third of the room, and lighting operating in that portion as well.

I could no longer resist the siren call of an operating section of track, and so I have knocked together a bit of benchwork and started on a backdrop in the hopes of putting together the beginnings of a paper mill scene. The grand plan is for this to play a part in the larger layout, so it's not wasted effort. Here's a look at what I've accomplished to this point:


The theory this time is to use Code 83 track and turnouts for their better appearance. Having grabbed a handful of Walthers/Shinohara Code 83's some time back at what I thought was a great price ($10 each, new in box) I was a bit dismayed upon realizing that they were the old style power-routing turnouts, and not at all DCC friendly. Following a bit of internet research and toying around with an ohmmeter, out came the rotary tool, styrene, and super glue. It didn't take long to cut gaps and fill them with strip styrene, then file the plastic to the shape of the rail.


I think this will take care of the DCC issues. Basically I am creating dead frogs, which shouldn't be much of a problem as the Atlas turnouts I normally use also have dead frogs. We will see after I get some track down and feeders installed. These don't feed past the frog after surgery, so I will need to press the soldering iron into service before I can make any final judgements.

All for now, soon I will try and get some track plans posted and describe the operating scenario I have developed.

Monday, November 26, 2012

What's in YOUR Wallet Basement?

Kind of a joke of a title. I always loved those commercials.

Anyway, one of the reasons posting has been non-existent for over a month is my preoccupation with planning and construction work on the latest version of the West Central Minnesota Railroad. Whether it is trying to learn how to use AnyRail, reading John Armstrong's Track Planning for Realistic Operation, or actually putting up walls, I've been able to occupy my spare time with little left for blogging or railfanning.

Having staked out a little less space than I had for my last layout (about 16' by 19', versus 11' by 42' in Wadena), I sensed the need for two levels. That brought about the question of how to get trains from the lower level to the upper level, and vice-versa. There were two basic ideas-a "nolix", or building a grade into the track as it travels around the room, and a helix, which wraps a bunch of track into a spiral to allow trains to climb between levels while keeping the grade manageable. The debate between the two has consumed many electrons, and each has its place, but I decided on the helix. Here's why: I wanted to have areas with no grade for switching on each level. After building two vertical curves on my last layout, I didn't relish the idea of multiple vertical curves this time, not to mention that the level areas would eat up footage that was needed to keep grades manageable with the "nolix" concept. Ergo, the only option left to me was a helix.

There was one other reason I wanted to build a helix-I think they are cool, and I wanted to see if I could build one. As a matter of fact, I got so excited about it that I broke my own first commandment of layout building-finish the room before starting on the layout. Sure enough, I have a huge pile of ceiling tile waiting to be installed, and here I am twiddling around with a helix.

As of yesterday, here's a shot that gives an idea of my progress:


Currently I have almost two and a half full turns done, including track laid. These things eat up a lot of track. In fact, there will be more than 60 feet of track in the four full turns I am planning to raise the track 16". The grade works out to almost exactly 2%, but the trains will pull harder than that due to the additional drag of curves. 

When it's all done, there will be threaded rod supports all around the helix, to allow for precise adjustment of grade and make sure it's sturdy. Those are planned to be the final items installed. 

Today I got so excited that I made up a 6 car train, including two bay covered hoppers and 89' auto racks, and ran it up and down the track I had installed a couple of times. The 30" radius seems adequate, but the cars have to have good couplers and the trucks need to be installed correctly (one fairly tight and one loose). I have already found a couple of cars that needed a trip to the RIP track for adjustment, but got the whole thing running nicely after 15 minutes or so. The Athearn RTR GP38 had no problem with this length of train, so it looks like the grade will be manageable. 

So to answer the title of the post, a helix is what's in my basement as of now. More to come. Next time I may have a more polished track plan to share. 

Saturday, June 9, 2012

With a Whimper, Not a Bang


Following a recent board meeting, the parent corporation of the West Central Minnesota Railroad announced the strategic sale of the 74 mile shortline connecting Wadena and Cass Lake. During a news conference held at the railroad general office in Nimrod, MN (the terminus of a never-built proposed expansion that had been intended to serve a bison ranch) the CEO announced, "The board has decided that this is the proper time to refocus our activities to the east. The West Central Minnesota Railroad is a high class railroad that has made great strides in its ability to provided safe, timely, cost-effective service to a growing customer base. We are confident that a new operator will step forward and continue serving those customers." When pressed on the railroad's future should no new operator be found, the CEO was less encouraging. "Someone will buy it." he said, after being pestered by reporters for more than 2 minutes. "If it's a railroad operator, great, but remember that scrap prices are high too. We're outa here." He then turned tail and scampered away, an entourage of security guards covering his retreat. Local businessmen and civic leaders commented that "they never did trust that weasly @&;^%$$!"

Corporate officials following recent announcement of WCMR Sale

The next week local newspapers carried the following ad: "For Sale-11' x 42' HO Scale model railroad. Nice condition. Includes continuous run loop. Only operated by a little old lady on Sunday afternoons. Track cleaning records show meticulous maintenance. The infrastructure is in tip-top shape, except there is hardly any ballast and we do have to disclose some power problems on a couple of the #4 turnouts. Completely wired for DCC, most of the feeders tied in to #12 power bus. Loconet installed with 6 plug ins. Passing siding holds trains made up of 2-6 axles diesels and 21 cars. Most of the backdrop is painted. Bring your own rolling stock, motive power, DCC system, and customers. Buyer assumes liabilities with locomotive rebuild shop in Bemidji MN. Oh, and some of the trees have not been trimmed since a recent tornado. $12,000,000 or best offer. Call 739-4567."

Nobody called. And so ended the saga of the WCMR, once-high hopes dashed against the greed of out-of-state railroad executives known for questionable ethics. The only happy locals turned out to be the members of the snowmobile club, whose eyes twinkled at the thought of a new trail. Just goes to prove that every black cloud has a silver lining if you only look hard enough.

(Like a Phoenix, the railroad just may rise again in a different location. You can't keep a crooked RR exec down!)

Monday, May 28, 2012

The Scene

The deeper I get into modeling, the more detailed I want the backstory to be. Trains running around the layout are awesome and will never get boring, but this hobby offers so much more. One element of that is operations, which I have put a fair amount of thought into and hope to begin sometime in the not too distant future. 

If you want an example of a layout with a backstory, just look at any of Ian Holmes' masterpieces. He knows what he wants a layout to do. He designs and operates it so any halfway-attentive viewer understands it too. On top of which he is a great modeler. Total package. 

One other aspect of model railroading can be photography. In a way photographing models is like photographing the prototype. You can sit your camera at a crossing and shoot train after train (especially since YOU not the railroad control the train volume-and consists). But just like in real life, that gets boring. What else can you work into the photo to make it more "interesting"? That's the challenge. And that's where this photo comes in.


Wanting something more than just a train at a crossing AND wanting a backstory, I came up with this in my free 15 minutes tonight. We're across the street from the C-Store, just a couple of blocks down from CSM Plant Food. A CSM truck just finished fueling up at the pumps. A farmer's kid, with a shiny new John Deere tractor and offset disk, has pulled in for a refreshment before heading home. A boxcar sits on the CSM spur waiting for a load of bagged beans. All of a sudden an eastbound freight decided to rumble through town. Our intrepid railfan decided to try and capture all of these things in the viewfinder of his camera, and this is the result.

To me, this kind of background is what makes the railroad environment real. It's kind of like trying to figure out what's in all those containers and trailers as a Z train passes as you are out railfanning. Just as I try to figure out what the railroad is doing to better understand why it exists in real life, I want to understand what is going on in my miniature world down in the basement.

As a side note, there is one new item I'm kind of proud of in this shot. The offset disk is a new creation, with a backstory of its own that I will share in a post soon. Here's a hint-next time you see a bag of sequins in Wal Mart, ask yourself what good they might do on the layout.

All for now.

Saturday, May 5, 2012

AAAR

That means Alexandria After Action Report. My earlier post from the site was only part of the story. There's more-more people, more product, more excitement. Here goes.

Shortly after hitting "Publish" for the first post, we were joined at the Great ATS (Alexandria Train Show) by Bryant and Mike. They had the chance to admire Ian's work and  some of Jer's locomotive modeling. While this was going on, the 8106 was in the loco hospital intensive care ward.

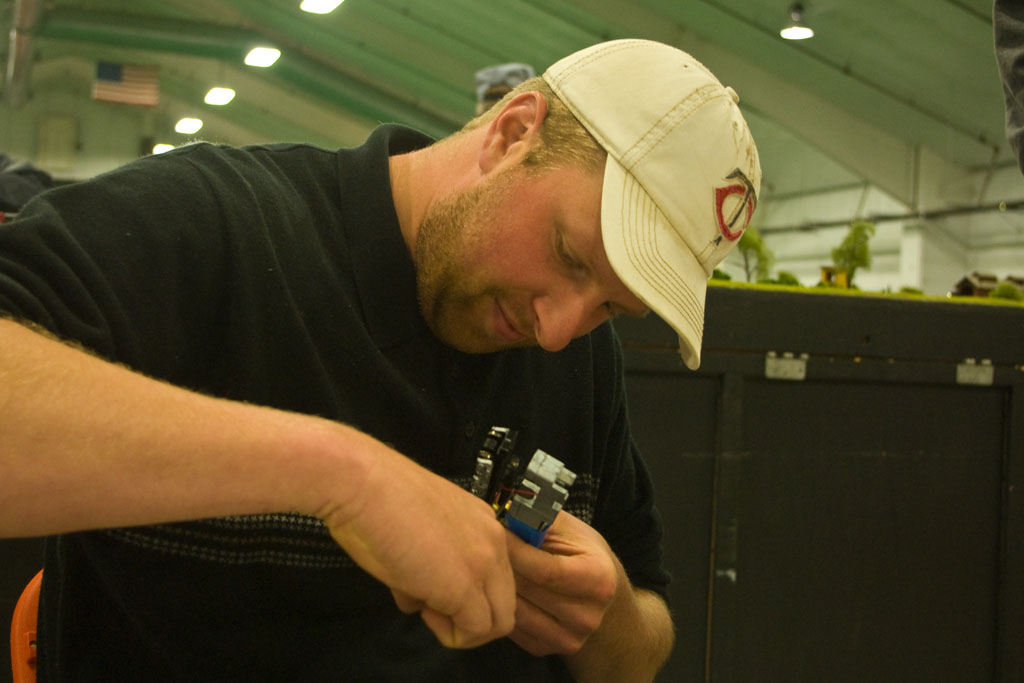
After extensive work by specialists, the 60M was determined eligible for release and the proud owner soon found a DCC layout for a test run. When locomotives run they should move. The fact that this one wouldn't alerted Jer to a problem. He immediately started taking things apart, assisted by the expert guidance of a number of noted HO Scale mechanics. This photo shows the intensity he devoted to the repair of a detached driveshaft.
In the meantime, Mike was less concerned about the fate of the 8106 than with an approaching Soo Line F unit. I was almost certain I heard him call out "It's the red one!" but he claims that never happened. 
Mike and Bryant wandered the hall in search of N scale treasures. I don't think they found too many, in contrast to the HO crowd (me) who went home feeling like I had hit the jackpot.
In fact, my first-ever case lot purchase of freight cars had me feeling a bit like Christopher Muller as multiple trips were needed to carry all the loot to the car. In addition to these reefers I was able to procure a bundle of 10 sticks of Atlas Code 83 flextrack for only $20, along with three #6 turnouts to match for $4 each. 
I parted with one of the reefers, as Ian needed it to provide traffic for a planned layout expansion. That doesn't mean I'm worried about the beer getting warm, there should still be plenty of space. Here are today's additions to the freight car fleet, including a lonely Atlas Kaolin tanker. 
 Once again, this was a fun show. Got to spend time with good friends, chat with others who enjoy the hobby, and spend more than I should have. A great day of railroading.


LIVE from Alexandria!

Greetings from the Alex train show! Ian is showing his small layout, featuring the Hamon Deltak plant where massive industrial things are manufactured. In order to obtain the raw material and ship the finished products, rail service is a necessity. And with rails running by the plant, you might catch other trains once in a while as well. Hey-here's a DMVW SD45 running light engine by the plant, far from home rails.
And then a rock train cruised by in the other direction. This one had the famous pair of 8106 and 8142 on the point. Triclops rule, they say. 
Those units are some fantastic modeling by Jer.

In the mean time, Ian operates the layout during the show, giving attendees including kids a thrill. Everyone likes the layout, but when a train rolls in from off-scene, the youngsters eyes just light up.
A finished product comes out of the plant. This is a HUGE heat exchanger destined for points west.
Finally, a shot of the bandit that has been handling the work at the plant.
Congrats to both you modelers. I'm having a great time.  Lots of good deals on HO scale equipment as well.

Monday, April 30, 2012

Operation Lifesaver in HO

Not sure about anyone else, but every once in a while a Model Railroader article gets my attention. Most recently, Pelle Soeberg penned a story about operating grade crossings. He's a great modeler, but the story told a lot about what you have to buy to do this. Given my legendary cheapness, it seemed like a challenge to me. And so it came that on a Sunday afternoon when my back felt like it had been bit by an alligator, the living room became a grade crossing signal assembly point for a day. The raw materials included two different types of coffee stirrers, the ever-present plastic sign material, a few scraps of Evergreen styrene, a hunk of wire, my imagination, and the internet for some photos. A few fits and starts and three hours later (the same amount of time as the Gilligan's Island boat ride was supposed to take), I had this.

That seemed like a fair start. I fiddled with it a bit more in the evening, and then tinkered around some more on coffee breaks today. Gotta give the paint time to dry you know. 

So after the darn thing was put together, I decided to let it do its work. Here the signal is protecting the grade crossing for a coal empty behind a shiny ACe. I'm the power for raising and lowering it, and the flashing lights await advice from the electronics wizard Chris Muller. 

I think it's slightly oversized. That can be fixed in production versions, though. Heck it will be an advantage as the scrap box will go further that way. 

And as long as I had the camera out and trains running it seemed only proper to shoot one more photo. If you have ever tried taking model photos you likely are aware of the depth of focus issue. This photo is stacked from 6 or 7 shots by Helicon Focus. Man that is same jaw dropping cool software. 

That's about all for this post. Hopefully my back improves, the sun comes out, trains run, and I catch something cool down south later this week. Minnesota Prairie Line, DME, and the Marshall Sub are all potential victims of my journey starting Wednesday.

Tuesday, February 21, 2012

What Came First?

Many times I have read the advice to prospective layout builders-"prepare the room before you start building the layout." Confession-I have violated this rule, by what I have done and by what I have left undone. Hopefully this post will serve as an example to those who come after me, saving them the frustration of trying to do finishing work on the layout room AFTER having spent a good deal of time a-building.

It all starts out so (seemingly) harmelessly. You tell yourself "With all these cool models, I just have to get some track laid so they can be seen running." After all, that's the point. The thing that sets model railroading apart from many other hobbies is the dynamism-the fact that in addition to being cool to look at, the trains actually move on scale-size track. And so you knock together some benchwork, glue or nail down some track, hook up a set of wires, and shazaam, the trains are off and running.

At this point, you are past the point of no return. One thing leads to another, and before you realize it the layout has grown like a well-fertilized weed. More models are acquired, which requires expansion. One of the rules of model railroading is that the layout will grow to fill all available space.

Then you start to realize what still needs doing. In my case it was a ceiling, to rectify the dungeon-like atmosphere that the floor joists project. It's all dark, and dusty, requiring massive amounts of light and sifting a light coating of fine dust all over everything that no amount of sweeping and vacuuming can ever overcome. Next thing you know you are wheeling a cart through a Menards with a full load of ceiling tile and giant bundle of 1 x 2's along with things like screws and staples, and shortly thereafter this sight greets you when you walk into the train room.


With the investment made, the administrator of the household may begin to ask for anticipated completion dates for this latest project. In my case I use a scientific formula to determine this date, with inputs like how long I think it will take (multiply this by 3 to enter into the formula), how long can the completion date be pushed out without causing a confrontation (this value becomes easier to determine after 30+ years of marriage), and what my real work schedule looks like.

Then I make up a number, throw it out, and see how it is received. I tried 3 weeks in this case, for the first 5 cases of ceiling tile. The total project will take about 12 cases. After a reminder that neat workmanship that will NOT NEGATIVELY IMPACT RESALE VALUE is exptected, an acceptable date is negotiated.

It's usually right after this agreement is made that you remember how much will have to be done to actually complete the job, things like wiring to accomodate lighting and trim to make the job acceptable to non-modelers. Can't see any need for trim, myself, who would look at anything other than the trains anyway?

And so, having never installed ceiling tile before, you set out from one corner. Yes, I measured the room, and hopefully won't have to do any major trimming of the tiles, so up go the 1 x 2's, and immediately following that, the first few tiles. Here's how it looks just after starting.


With 15 tiles now installed, the work is underway. Heck, only 465 or so more to go. However, there seems to be a holdup, since now work has to turn to installing outlets for lighting, so the tile installation has come to a halt and the electrician's hat has come out.

Makes me tired just to think about it. Well, at least I might be rested up when I get home Friday and make some more progress over the weekend. I hope.

Sunday, January 15, 2012

Killing Time

This afternoon I got the bug to tinker with an old blue box SW1000 I bought used a while back, just when I was getting back into model railroading. With the arrival of newer and fancier power, along with DCC, it had been relegated to a shelf spot. It was time to change that.

The materials were on hand-a decoder, the tools and material for installing it, and decals to patch the unit from BN to BNSF. After pulling off the shell, I cut off the original headlight assembly and tore out the electrical clips. I soldered in a DH123 decoder using the supplied harness, and installed an LED for the headlight.

While watching the Packers and Giants, I turned to the shell. (It's hard to solder in the living room.) The decals had some green trim film that was used to cover the old road number, logo, and road name. After these set up the "BNSF" initials and new road number were applied.

I tested out the chassis, and it ran. After the game I went down, installed the headlight in the shell, mounted the decoder in the shell with double sided tape, and slapped it all together. Wonder of wonders, it still ran! Here's what it looks like now:


It's got the distinctive blue box "coffee grinder" sound, for no additional money. I also haven't figured out what to do about a rear headlight yet, but suspect it will involve a tiny SMD LED. You can see it still needs MU hoses and cables, along with couplers and weathering. And I know the road number is for an SW1500, but it's what Microscale included on the decal sheet I had. It doesn't bother me.

While not finished, I am surprised that I was able to decide to do something after lunch on a Sunday, start on it, and have the darn thing running by 7:00 PM. Most of my projects take multiple times longer than I anticipate, this one went by many times faster than I had figured on. I guess that's a good sign!

Monday, January 2, 2012

New Year's Modeling

This morning I sat myself down in front of the computer to try and do something I've been contemplating for a long time. What I had in mind was figuring out a way to create and print some 53' intermodal containers. The idea came from sites like this one, where you can get a huge variety of images of 20' and 40' shipping containers that can be printed out folded to create passable HO scale models. I have a bunch of these and really like them, especially the price, but today's Z trains are chock full of 53 footers. How could I create such a thing?

Well, I took a 48' JB Hunt container I had, scanned it, and using the cut and paste tool in Elements "grew" each end about 2 1/2 feet. (Note to self: make sure to extend the ends, not the center. One of the principles of intermodal transport is that the frames remain on 40' centers. Don't ask why I am mentioning this.) I scanned each side, the top, and each end individually and after editing them pasted them all together to create this file:

After printing a few copies out, and cutting a piece of wood to the proper dimensions, I folded and glued one up. It worked fairly well. Next I just folded a couple more up, without the wood block, to compare. Here are the results:


They certainly aren't perfect, but with the factory made items bringing more than $8 each, I think they prove acceptable. With two more sets of spine cars on the way, I sure can't afford to fill everything up at nearly $10 a container. Now to figure out a way to manufacture 53' trailers.

While I was playing in the basement, I ran a train as well. Here's a photo to show off the work of Muller Locomotive Works. He installed the ditch lights on this unit, along with a sound decoder. I finally got the front handrails and couplers back on, and the unit is now in service on local trains. Kudos to Chris for his work on this unit!


So that's how I spend my leisure time today. It was great fun and for once, I actually have something to show for the time.